Thursday 2 March 2017

Easter page

This is a fun page I designed for children using limited materials.  I have done it as a double page spread to show lots of ideas expecting them to do it as a smaller page using only a few of the ideas that they like.

These are the 3 serviettes I started with.  I cut them up into 1\4's and used one of each plus added some more of the eggs.  I pulled the ply apart they were all 2 or 3 ply.

They white shadow ply layer I used to add texture in the unused areas after I had glued down what I wanted.

 After drying I added a layer of yellow
 very light in some areas.

Bubble wrap with orange paint was the next layer. 

This wrap came from around fruit another cheap stencil.

Punchinella with white paint to add 
some light highlights. 

Black paint and an old card for mark making.

Then using various pens I scribbled around eggs drew inside the eggs and around various other items.

Final step was to use my finger and melted chocolate to create a border and highlight some of the crinkle raised areas throughout the pages.

The final page I'm going to be interested to see what take the children do with it.  Hope they have as much fun as I did.

Friday 3 February 2017

Lulu Art promps weeks 4 and 5

Decided to play with these today, only had four colours.  No preparing of page other than masking tape the join to stop seepage as needed to spray with water.  This was to be an experiment.  

 I ended up with way too much water on the right hand side.

 Decided to blot it off but left the left hand side alone.
  
Part of a colouring page was to be the main feature.

 I do think letting the page air dry gives a more vibrant colour.  In this case it worked out a treat.  I do like the effect so will be playing more in the future.  More colours are on the wish list too.  Hope you get some to try yourself, the result can be unpredictable but lots fun as a jumping off point.

Just had to have fun with this quote and the
MacDonalds cup I had collected :)

Please use this link for any products:  
http://www.luluart.com.au/?Click=486  

Sunday 29 January 2017

Mini Album ready for photos $15

All decorations are able to be removed or moved around.  The frame for example on the cover is only partly stuck down ready for a photo or removal if you choose.

 Front ready for photo and has elastic loop to close.
Back. 
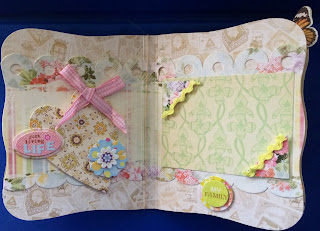
First page.  
There is a clear pocket that would hold 2 photos. 
 Second page, here you can see I have placed white paper inside the photo holder and added decorations.
Other side. 
Page three again with a clear photo pocket that is decorated. Decorations can easily be removed as can the arrangement of pages or even add in more. 
Other side. 
Page four. 
 Other side.
Page five.  In this one is a pocket with an envelope and a pocket on the back cover.  Lovely places to store trinkets. 
Envelope filled with treasures to decorate further. 

60th birthday card and mini album SOLD

Loved how these turned out perfect gift pair.


 Front of mini album to put photos in.


The little envelope holds treasure that can be used as added decorations throughout the album.  This is a spot for photos. 

Jimmy the man in my life :)

Hes such a poser so loving my boy :)

 So cute the way he lifts his leg.


Wednesday 25 January 2017

Lulu Art prompts week 2 & 3

Has been a busy couple weeks for me with a trip to Brisbane just to name one thing so had not got around to posting before this.  I did have fun creating these pages tried out a few new ideas.

"One step at a time"

Discipline to reach ones goals for the year and conquer that mountain that faces you at the beginning of the year.

For this one I collage each layer with different materials to add to the illusion of mountains.  The front one has quite a bit of texture on it which I added to by gluing smaller pieces on to represent ledges on cliff side. 

New beginnings are often disguised as painful endings.

Remember past death of pets and family and now 
with my Jimmy the joy he brings into my life :)

Sunday 15 January 2017

Secret Garden Cal 2017

This will be an ongoing post as it runs for some months.  First square due out in a few hours.  I'm prepared ready and raring to go and super excited as this one is for me.

I was given two of this one, think it was for backing on fish tanks nice and thick so with the wide sellotape and contact  it should last a while.
There was only one of this print hence the 
scrap sides and bottom and butterfly inside. 
The scrappy side decided to add in the bits around my 
new art journal so both worlds are meeting here. 
 Yes butterflies had to make a show in somewhere had just enough of this wrapping paper for inside bottom.
Awaiting the first stitch.  I also bought an extra ball of each colour just in case which will be the start of my stash :)

Practice square for week one finished.

Don't they look so cute at this stage.

Square one finished in the four colourways.